uWebChat Virtual Agent (AI) setup
Set up an AI-powered Virtual Agent for uWebChat with Azure OpenAI, including API keys and Teams configuration.
uWebChat offers the functionality to interact with a personalized virtual assistant for customers with an Enterprise license.
Background
In uWebChat, there are two types of agents:
- Human Agent — A regular Teams user who can be assigned to answer chats.
- Virtual Agent — Initially set up as a regular user but automatically converted to a Virtual Agent once linked to an AI Bot. Virtual Agents can handle chats when human agents are unavailable or act as the first point of contact. They are always "available."
Create OpenAI API Key & Assistant ID
Obtain an API Key
You can bring your own OpenAI API key OR request the uWebChat team to create one for you (a paid Azure subscription is needed).
Use the following Microsoft documentation to create your Virtual Assistant: How to create Assistants with Azure OpenAI Service
Choose the appropriate model gpt-4 (1106-preview). This model uses a significant number of tokens due to context usage. Always set limits (budget) on the API key usage.
Create Virtual Agent in Azure OpenAI Studio

Azure OpenAI Studio
Upload relevant information (files) such as PDFs and Word documents. You can upload up to 20 files, max 512 MB.
Restrict behavior by providing clear instructions, for example:
"uWebChat is a live chat platform based on Microsoft Teams. It is created by Universal.cloud. It can be embedded in a website or use WhatsApp Business as a channel. Your task is to answer questions about how to use and set up uWebChat. Keep responses brief."
Securely share endpoint, API Key and Assistant ID
Send the API key and Virtual Assistant ID to support@uwebchat.com. Alternatively, replace the API key using the replaceOpenAIKey dialog.
Setup Steps for the Virtual Agent Teams Account
Step 1: Create a Teams user
Use the Microsoft 365 admin portal to create a regular Teams user and assign a Teams license. Log in with the new user and interact with the uWebChat bot.
Step 2: Confirm new agent profile
An admin must confirm the creation of the new agent profile. The agent can type the debug command to verify their details.
Step 3: Send details to support
Email the debug output to support@uwebchat.com with subject: "Convert to Virtual Assistant: Virtual Assistant ID: XXX-XXX-XXXXX".
Step 4: Link Assistant ID
The support team will link the Assistant ID from OpenAI to this agent.
Use the Virtual Agent
After linking, you can add the Virtual Agent to a group like a regular agent. The priority determines how it is utilized:
First point of contact
If the priority (Prio) is set to 1 and no other agents with Prio 1 are in the group, the Virtual Agent acts as the first point of contact.
Fallback agent
If the priority is the same or lower than other agents, the Virtual Agent responds when no other agents are available.
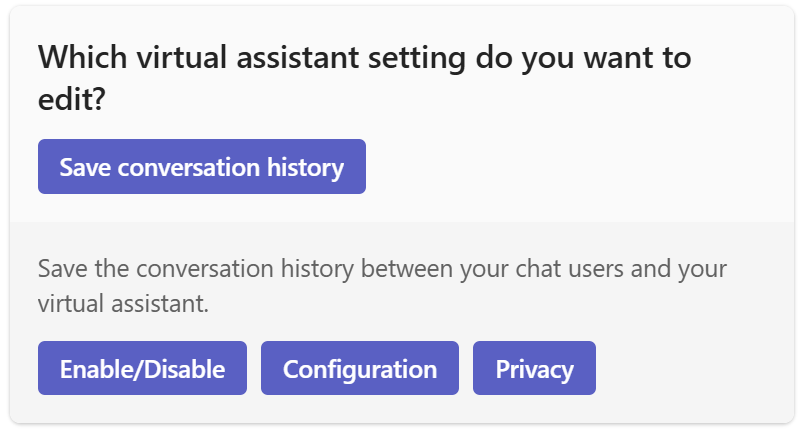
Save conversation history
To get insight into how visitors interact with your Virtual Agent(s), you can save transcriptions. Go to Help > Manage Virtual Assistant > Edit Virtual Assistant Settings > Save conversation history.
Enable/Disable
Toggle transcription saving per Virtual Agent globally.
VA settings
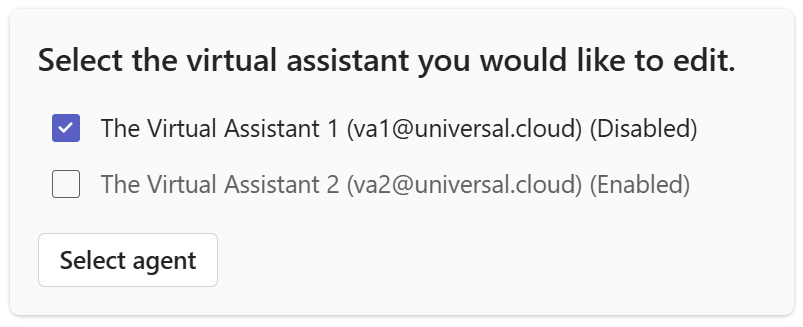
VA enable/disable
Configuration per group
Create configurations per group for saving transcriptions. Choose from two storage types:
- OneDrive (Simple): — Manual saving through an Adaptive Card
- Azure (Advanced): — Automated saving to your own Azure storage account
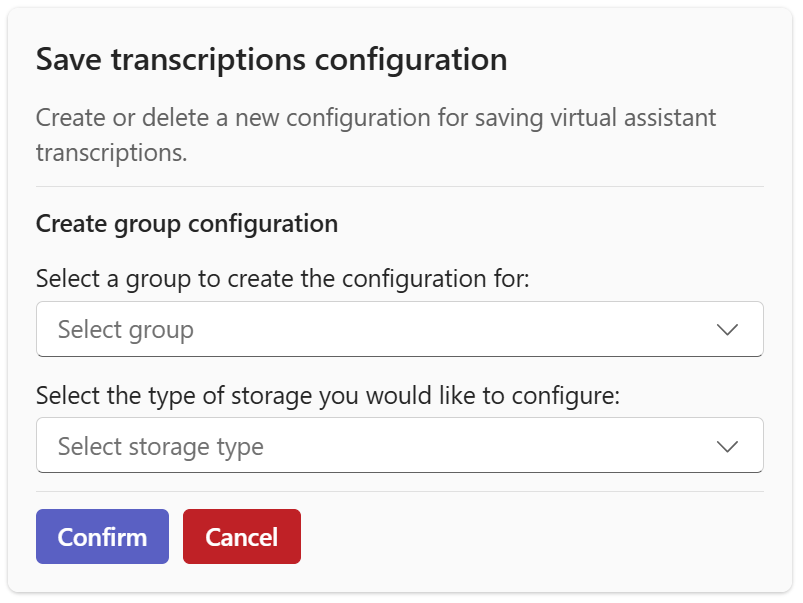
Create configuration
For OneDrive, a designated agent receives an Adaptive Card after each conversation.
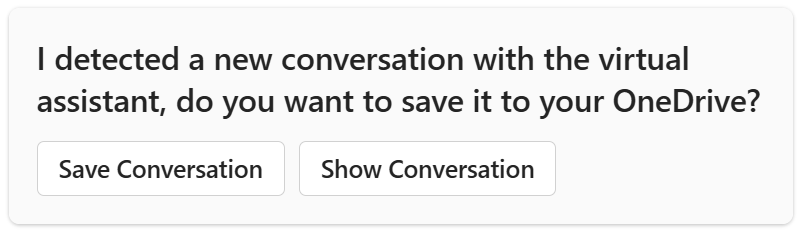
OneDrive transcription
For Azure, enter a connection string to your Azure storage account.
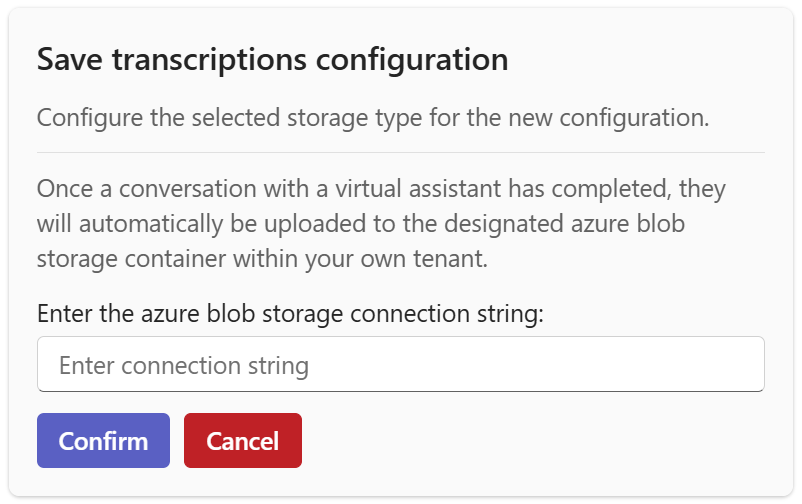
Azure configuration
Privacy
Toggle masking of visitor names in transcriptions.
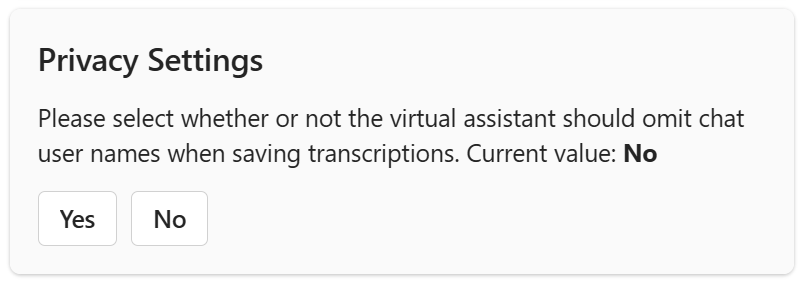
Privacy setting
Chat With Us
Get instant help from our support team
News & Insights
The new uWebChat Voice portal is live
2026-03-31
Laptop prices are rising fast: order now before it's too late
2026-03-16
Microsoft 365 E7: the new all-in-one suite for AI and productivity
2026-03-12
Related Articles
Need More Help?
Can't find what you're looking for? Our support team is ready to assist.
Submit a Support Ticket